
Bircher Muesli
gluten free · vegan · paleo
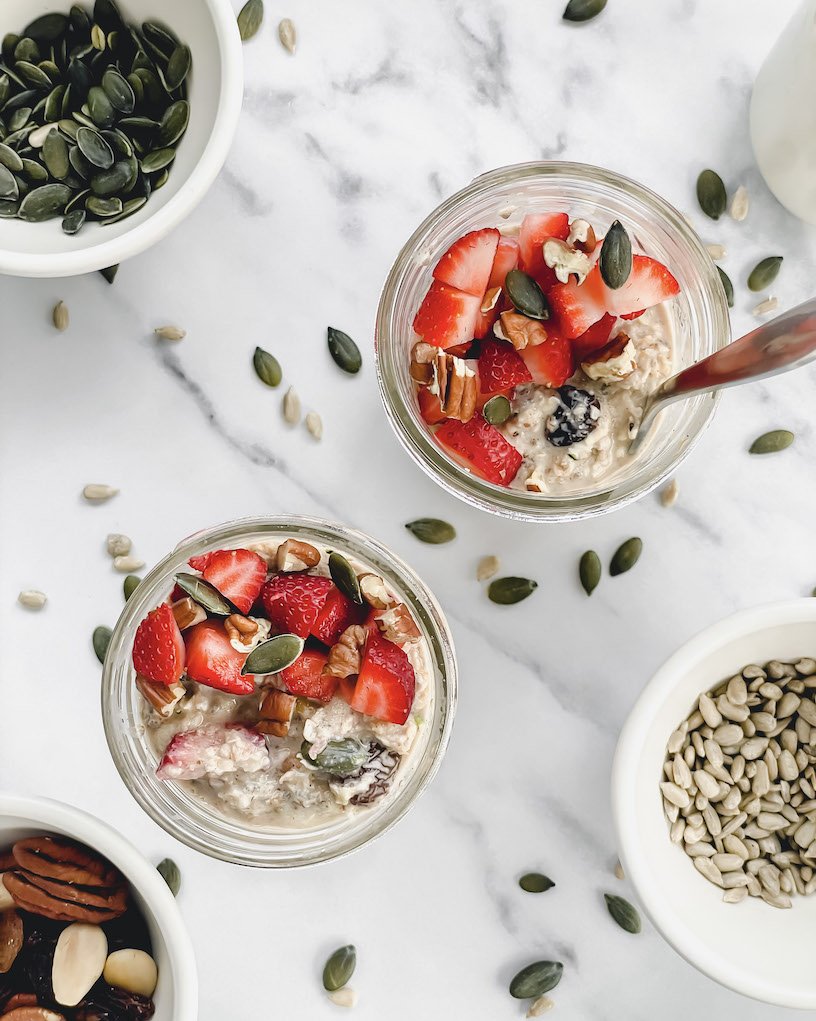
Bircher Muesli is a traditional Swiss breakfast, and is essentially the original version of the now very familiar ‘overnight oats’ awesomeness.
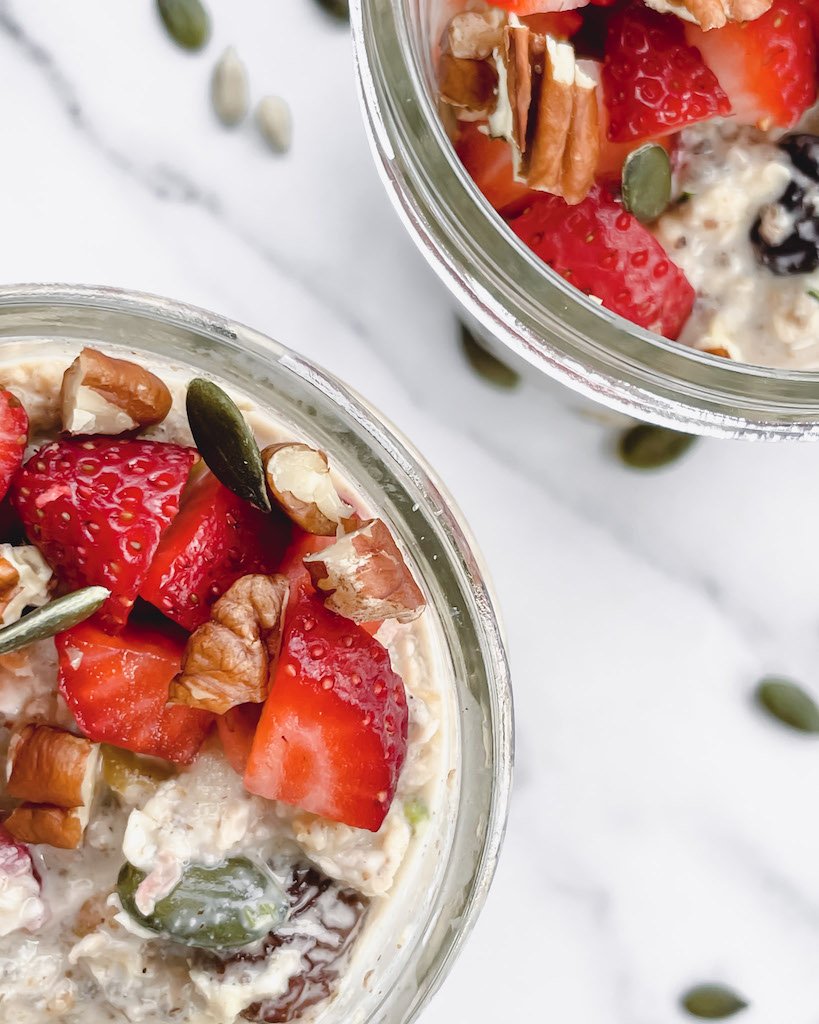
Is it not one of the healthiest-looking things out there? Just taking the photos made me feel healthier! In addition to being healthy, this goodness is really filling too. You don’t need a large serving of it to fuel up, though you may want one because of the yum factor. I also consider it a real comfort food, there’s something so satisfying about the texture and the whole dipping-the-spoon-in-and-scooping-it-up dance.
It’s fairly common to find pinky-hued versions of Bircher Muesli. This pretty colour can sometimes be a result of the included berries being crushed, which is fine, but sometimes it’s because a flavoured fruit yogurt has been used. I prefer to avoid these, simply because they are often a source of added sugars, artificial sweeteners and other non-health-promoting (and often gut-challenging) ingredients. Also, it’s just not necessary - the Bircher Muesli flavour holds its own just fine with plain yogurt!
Creating, photographing and writing up this recipe has made me very happy for my own little reasons… I’ve spent quite a bit of time in Switzerland over the years, primarily for medical reasons. When the traditional medication route for my Crohn’s failed me, I found a clinic over there (sadly no longer in operation), with a functional medical approach, that was able to support me as I worked to get my health on track. All those years, there was not a single breakfast buffet that did not have an incredibly tempting bowl of Bircher Muesli at its heart.
It became a way for me to gauge how under control my symptoms were - if I could eat a small bowl without ensuing tummy complaints, I knew I was in a good place! And when I was struggling with symptoms or a full-on flare, then I would reluctantly keep my distance. What was trickier to navigate, was those in-between phases, where maybe I wasn’t quite fantastic, but I certainly wasn’t aggravated or flaring either. In those phases, I still wouldn’t risk the readily-available versions, with the masses of fibrous texture, cow milk/yogurt and whole chunky nuts. Instead, I figured out ways to make my own at home, with variations in ingredients and texture, so I could enjoy it without worrying about aggravated symptoms. And this is the result! I hope you enjoy it as much as I do.

INGREDIENTS
Gluten-free oats
While oats are gluten-free by nature, there can be cross-contamination with wheat, as they are often grown in the same fields or handled in the same factories. For this reason, it’s important that you ensure your oats have a ‘gluten-free’ certification.
Oats are a great source of fibre here, particularly beta-glucan, a type of soluble fibre that dissolves in water and becomes thick and gel-like in the digestive tract, which is great for feeding the good bacteria in the gut and protecting the gut tissue, but also helps to get things moving along easily.
They are also very filling, which is great for a breakfast dish, to get you fuelled-up for the day ahead.
Rolled oats are the traditional choice for this recipe, however, I like to opt for steel-cut or even porridge oats for their softer texture, which also makes them more easy to digest.
Chia seeds
Small, but mighty, chia seeds are surprisingly nutrient-rich for their size, and are packed with fibre, protein and anti-inflammatory omega-3s, as well as a host of other antioxidants and micronutrients.
If you’ve ever met a chia seed, then you will be familiar with the gloopy, gel-like texture that is created when it meets a liquid (whether that’s water, nut milk or a yogurt). This is precisely what makes chia ideal for all kinds of vegan puddings, desserts and even replacing eggs in vegan baking. This gloopiness is officially called mucilage: a water-soluble, gel-forming fibre that can provide special support to the intestinal tract, both by soothing the gut lining, and by acting as a prebiotic, providing nourishment to our gut bugs.
You can leave the chia seeds whole in this recipe, or break them down a little in a food processor for a less gloopy (some would even go as far as calling it ‘slimy’) texture.
Flaxseeds
Also known as linseeds, flaxseeds are high in omega-3 fatty acids, antioxidants and fibre, making them a highly nutritious, and anti-inflammatory, addition to this muesli, and a great ingredient to have at the start of your day. Like chia seeds, they are also a source of mucilage.
Whole flaxseeds don’t really get effectively broken down in our digestive system, so eating them whole offers us roughage benefits, but not much in the way of nutrients, as most will pass through the gut undigested. Breaking them down by grinding them into a powder releases the nutrients, and allows them to be absorbed when we eat them. Flaxseed meal is also rich in both soluble and insoluble fibre, each of which has benefits for gut health.
You can find ground flaxseeds ready-made or can easily do it yourself by quickly blitzing them in a food processor or coffee grinder. Just remember to store your ground flaxseeds in the fridge, to preserve all the goodness that is released when the seeds are broken down.
Hemp seeds
You want to use hulled or shelled hemp seeds (as opposed to whole and unhulled) here, often called hemp hearts, as they are easier to digest than the whole seed. They have a mild, nutty flavour and are rich in healthy fats. They are also an excellent source of plant-based protein (more so than chia or flax), and are (like quinoa) considered a complete protein source, as they provide all the essential amino acids. Complete proteins are rare when it comes to plant-based foods, so hemp seeds are great to have on hand for ensuring you are meeting your plantiful protein needs!
Pumpkin seeds
Pumpkin seeds - also known as ‘pepitas’ - are oval in shape, and can be eaten either shelled or with their white husks intact. The shell-free seeds are green and flat - these are what we want to use in this recipe.
Pumpkin seeds are rich in zinc as well as phosphorus, magnesium, manganese, copper and iron. They are also a good source of plant protein and fibre. As well as having anti-fungal and anti-viral properties, they are rich in a unique diversity of antioxidants, including a wide variety of forms of Vitamin E.
Finally, these seeds are a source of the amino acid tryptophan, which can help promote healthy sleep and is also the precursor to serotonin, our happy hormone.
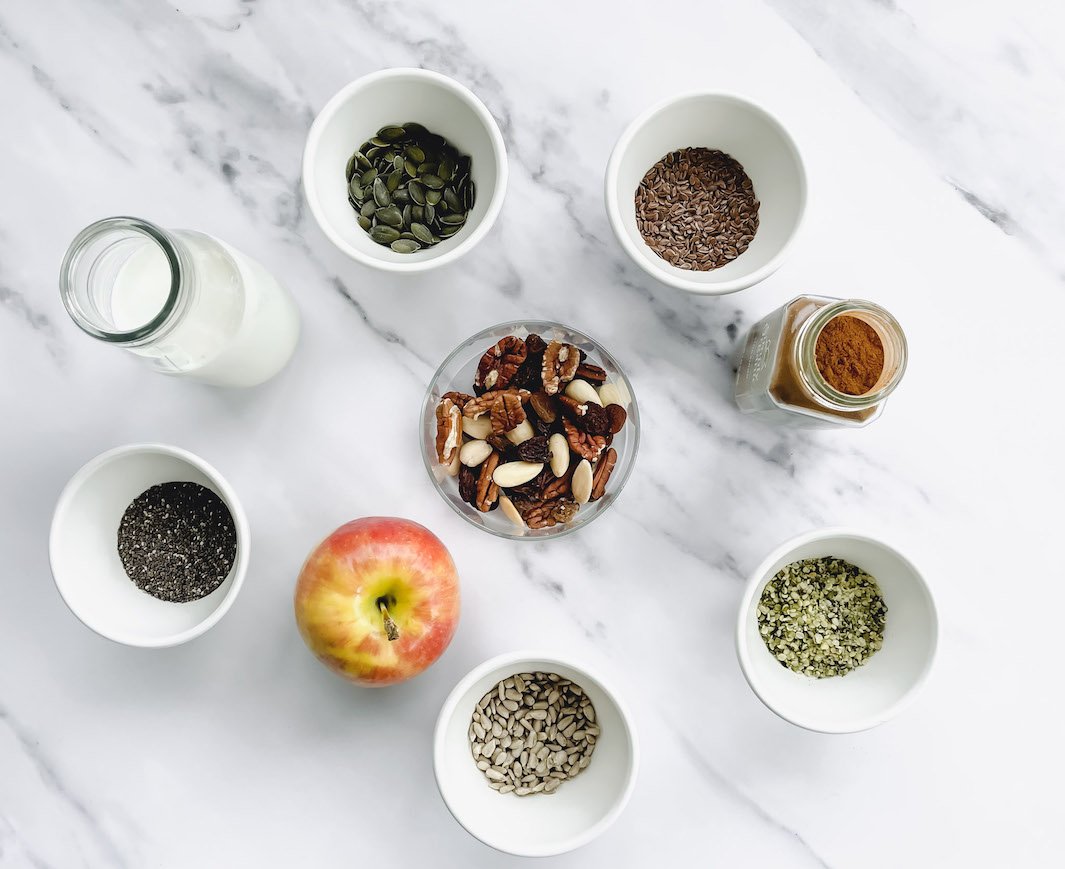
Sunflower seeds
Mild and nutty in flavour, sunflower seeds are an excellent source of key antioxidants Vitamin E and selenium, and contribute to the regulation of inflammation in the body.
Nuts
Feel free to choose whichever nuts you like for this recipe. I usually opt for almonds & pecans.
Dried cranberries
Cranberries are rich in several vitamins and minerals, including Vitamin C, and are high in antioxidants - quercetin in particular. They are also helpful for stomach health as they contain unique plant compounds that can prevent specific bacteria, called Helicobacter Pylori (which is a key factor in the development of stomach ulcers and inflammation) from attaching to the stomach lining.
Raisins
Raisins, a type of dried grape, are high in fibre and antioxidants, and add a lovely hint of sweetness to the muesli.
If you find the distinction between raisins, sultanas and currants somewhat confusing, you’re not alone! They are essentially all different types of dried grape and can be used interchangeably, according to which you prefer. However, just be aware that sultanas (also sometimes called ‘golden raisins’) often have sulfur dioxide (a preservative) added to them, to give them their lighter colour. As some people are sensitive to sulfur dioxide, and can experience unpleasant reactions, including digestive distress, I recommend checking the ingredients label before buying!
Cinnamon
A great digestive aid, with blood sugar-regulating properties.
Sea salt

Apple
Any type of apple will do, but the taste will vary slightly. I have made this recipe with both Pink Lady apples (sweet) and green Granny Smiths (tart) and like both equally so I pretty much just use whichever I have at home. You can either grate the apple, or chop it into small chunks for more texture.
Apples are very gut-friendly due to their pectin content, which has protective anti-inflammatory properties and is also a source of mucilage (which both nourishes the gut and assists in its healing).
Non-dairy milk
Choose your favourite plant-based milk. Just keep in mind that more strong-tasting milk options may influence the resulting flavour somewhat.
Paleo milk options: almond, cashew, coconut, hazelnut, hemp.
AIP milk options: coconut, tigernut (chufa).
Other: oat, rice, soy.
Coconut yogurt (unsweetened)
Coconut yogurt is low in sugar and contains easily-metabolised fatty acids. If the yogurt is cultured, which I would recommend, then it also contains gut-supporting probiotics - key in the promotion and maintenance of gut health.
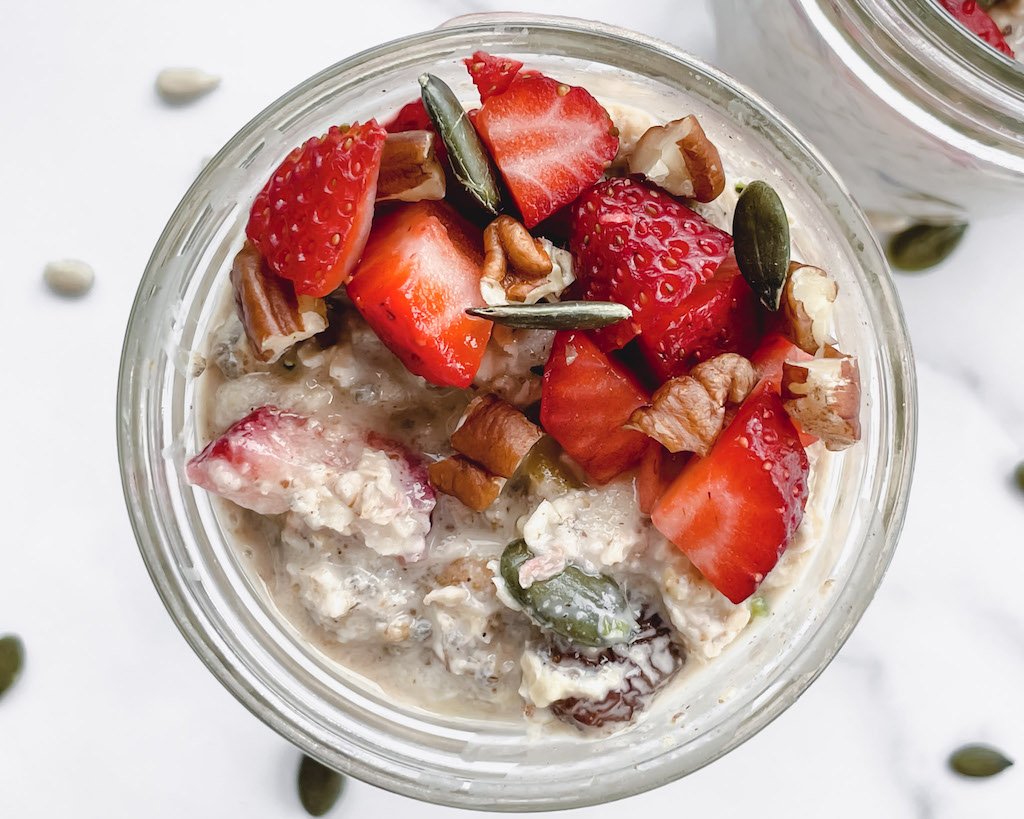
Fresh berries (optional)
You can always add any berries (or other fruit) you like as a topping when you come to serve your Bircher Muesli. I opt for adding them in from the start, both to save time in the morning, and also because I personally like the flavour better this way!
Vanilla extract (optional)
I never add this, simply because I don’t think it needs it, but other tastebuds may feel differently, particularly if they belong to children or to someone who is new to all these healthier, plant-based flavours!
Honey or maple syrup (optional)
Great options if you want a hint of sweetness in the muesli. I prefer honey here, but maple syrup is a great vegan alternative.
CHANGES & SUBSTITUTIONS
Up the probiotic ante!
Good quality coconut yogurt will naturally contain gut-loving probiotic cultures, but if you want to up the ante even more, you can bring some kefir (I recommend a goat milk version) into this Bircher equation. This would of course mean the recipe is no longer vegan.
Kefir is a fermented drink made from milk, and is high in nutrients and probiotics, making it beneficial for digestion and gut health overall. It can be a great addition to your diet, even if you are lactose-intolerant, as the lactose is used up during the fermentation process.
While kefir is generally well-tolerated even for those that struggle with eating dairy, goat milk kefir is even more so, as goat’s milk is generally easier to digest than the more common cow’s milk alternative.
If you want to make this Bircher Muesli with kefir, you can simply use it in place of either the non-dairy milk or the coconut yogurt. My personal preference, for the balance of flavours that truly sing to me (what? I’m not being dramatic about this at all!), is to keep the 1 cup coconut yogurt, but then reduce the non-dairy milk to 1/2 cup, and add in 1/2 cup goat milk kefir. Deee-lish!
Make it easier on the gut
Just the soaking of all the nuts and seeds helps break them down and make them so much easier to digest. However, if you are someone with an exceptionally sensitive tummy and are intimidated by this much roughage all in one go, you can take some extra little steps to make it even more gut friendly. The easiest way to do this is to grind all or some of the nuts/seeds. I like to grind the flaxseeds and chia seeds, chop the nuts (rather than leave them whole) and grate the apple (you can also peel it), leaving everything else as it is. I also opt for porridge oats (which are softer than the more traditional rolled oats) and for strawberries and blueberries over raspberries/blackberries as they have far fewer (and much smaller and softer) seeds.
Now, Bircher Muesli is all about the texture, and grinding most of the ingredients will certainly alter that traditional crunchy texture, but if it means you can enjoy all the goodness more comfortably, then that’s obviously the priority! You can always aim for a middle ground, where you grind down the majority of the nuts/seeds, but leave just a couple of spoonfuls whole to mix in for a more manageable amount of crunch.
And of course, don’t go overboard with a massive serving, and most importantly: don’t forget to chew thoroughly!

Want even more flavour?
If you have the time, and the desire for extra flavour, you can absolutely toast the nuts before adding them to the mix.
Make it low-FODMAP
Most of the ingredients are already considered low-FODMAP in the quantities per serving used here. You will just need to be mindful of your choice of milk (eg avoid using oat milk as, in combination with the oats themselves, this could tip things into high-FODMAP territory). You could also use half an apple, rather than a whole one (or leave it out entirely if you prefer), and can sub maple syrup for honey (if using) as a more FODMAP-friendly sweetener.
Endless customisation options
You can literally customise Bircher Muesli with reckless abandon, if you so wish! You can add or remove elements according to your tastes and preferences. For example, feel free to play with the yogurt and milk ratio to achieve a thicker or thinner consistency; change up the nuts or fruit you include; try adding in more spices etc.
Endless customisation especially applies to adding toppings just before serving. Now, this may be controversial, but I personally don’t add ANYthing to mine - I love it just as it is. However, for those who may want to play around with the recipe a little, you could try topping with:
Extra nuts/seeds/fruit (fresh or cooked)
A dollop of your favourite nut/seed butter
Coconut flakes
Chocolate chips (or grated chocolate)
Yogurt
Fruit compote or chia jam
Etc!

TIPS
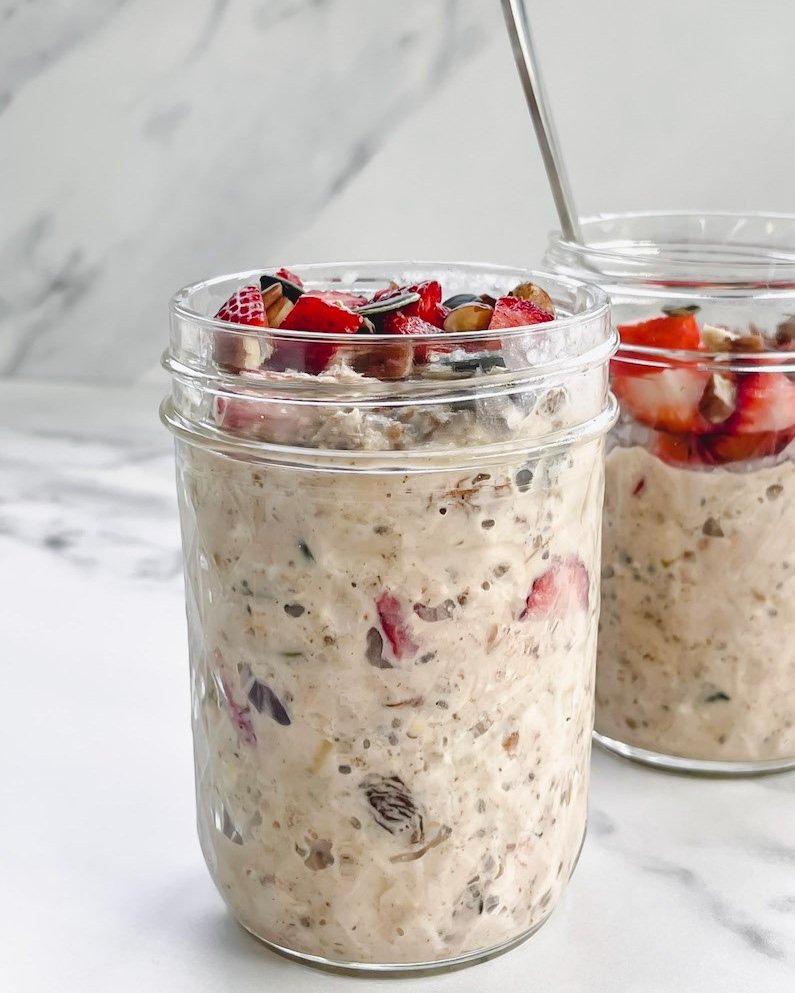
Once you have the mixture all prepared, you can opt to store it in the fridge in one larger container, and simply serve yourself from there, or, you can portion it out into individual servings in small jars, so they’re ready to go when you want them.
If you will be storing the Bircher Muesli in one container (such as a large jar or covered glass dish), then there is no need to prep the mixture in a separate bowl - simply add all the ingredients to the jar/container you will be refrigerating the Muesli in, mix everything together in there, and save yourself the extra washing-up!
This is a great multi-portion make-ahead recipe, and fits so well into a weekly meal plan. To maximise my meal prepping, I like to do a sort of ‘double-prep’, like so: while preparing the Bircher Muesli, have a second container/jar alongside your prep bowl and as you add in all your dry ingredients, also add a serving to the second jar. This way, you will end up with one fully-prepped Bircher Muesli, and an extra jar with all the dry ingredients ready, so when you’ve finished your first batch and want another, all you have to do is add the fresh fruit, milk and yogurt to that second jar. Just like that, you’ve more than halved your prep time!
Don’t worry if on day 2 or 3 your Muesli appears ‘watery’ - this is simply liquid from the fresh fruit and even the separation of the yogurt solids (as yogurt tends to do). You can just stir it through a little, or, if you prefer, pour off the liquid - up to you!

BIRCHER MUESLI
Ingredients
- 1 cup oats (steel-cut or porridge oats for softer-textured result that’s easier to digest)
- 1 Tbsp chia seeds (whole or ground)
- 1 Tbsp flax (ideally ground)
- 1 Tbsp hemp seeds
- 1 Tbsp pumpkin seeds
- 1 Tbsp sunflower seeds
- 1/4 cup nuts, roughly chopped (option to toast nuts beforehand for more intense flavour)
- 1/4 cup dried cranberries, unsweetened
- 1 Tbsp raisins
- 1/2 tsp cinnamon
- pinch of sea salt
- 1 large apple, grated
- 1 cup non-dairy milk of choice
- 1 cup coconut yogurt, unsweetened (or sheep/goat yogurt if dairy is well-tolerated)
- 1/4 tsp vanilla extract (optional)
- 1 tsp - 1 Tbsp honey (optional) (depending on your sweet tooth and your choice of yogurt - sheep yog may need more honey to balance out sharpness of flavour)
- 1/2 cup fresh berries, chopped (optional - can add these when serving instead, if preferred)
Instructions
- Combine all ingredients, transfer to an airtight container or smaller individual jars/containers, and refrigerate overnight.
- Will keep in fridge for 3 days.